Pages

December 07, 2017

And the fun goes on

Here's the second pair of pants that needed fixing.
Around the house, I had this fabric, laying around unused.
Since patches are still considered cool, I thought about going wild with this pair. Besides the knee, that needed patching, I went further.
1. I cut three parts from the fabric above.
2. With the sewing machine, I stitched the patches.
 3. The first patch was sewed on the back of the pants.
4. Before patching the knee, I sewed the hole first. Afterwards, I sewed the patches by hand.
5. And the funky pants.


November 27, 2017

Kids just wanna have fun

So be it!
My nephew, for example, has a lot of pants that seem to have suffered some 'injuries' while he was playing. In order to keep kids' joyful spirit and ease your worry about shaggy pants, I am going to show you how to recondition a pair of pants.
In this case (but I am sure this is the case for a lot of kids), the knee is the most sensible part.
1. I found a piece of cloth to cover the hole.
2. Since I wanted matching knees, I cut two pieces.
3. I sewed the hems on my sewing machine.
4. Before applying the patch, I sewed the hole just to make sure that the fabric won't unravel anymore.
5. I sewed by hand the patches.
6. Who's ready to go out and play?!
To be continued...

November 06, 2017

How to Turn a Sweater into a Cardigan

A friend of mine challenged me to do this. If you're interested, here's how it's done.
1. Choose a sweater. This one had a low cut, making the task much easier.
2. I cut the front into half, just like in the picture below.
3. I pinned the margins and sew them using the sewing machine. But it can also be sewed by hand.

4. Find a matching ribbon and sew it where you consider best on your new cardigan.

5. And the final result.

October 09, 2017

How to recondition an unwind sweater

Sometimes, no matter how careful we are, our favourite sweater could unwind. Here's an idea in case you're too attached to the sweater and you want to keep wearing it.

This rag was facilitated by a cute little dog. So no hard feelings there! :)
Always consider the location of the rag. In this case, it's easy to sew the rip and then apply a button on it. If the part you want to cover is larger than the one in the image above, do consider a long zipper or a large fabric that you can apply onto the rip.
Here's how I fixed this sweater.
1. I first gathered what I needed: scissors, needle and thread, and two buttons.
2. I sewed the rag. Tip: just concentrate on eliminating the hole. You do not need to be a master in sewing to do that.
3. I sewed the button on top of it.
4. I sewed the second button.
5. And that's a match. Not made in heaven, but ... it's got potential.
Do you like it? Have another idea coming soon.

September 30, 2017

Ideas for Parties. Pampering your guests.

I recently attended a party. Since I wanted to get involved in the organization of it, I started browsing through the internet for fun party ideas. It dawned on me that the guests should also feel special. Here's what you can do if you want to pamper the female-guests at your party: do make bracelets!
What you need:
- silk ribbon, scissors, needle and thread, some adornments (you can use beads, buttons or pendants).
1. Cut as many pieces of the ribbon you need. Consider the length. Mine were a little larger than a regular bracelet for I wanted to tie them with a nice bow.
2. Prepare the needle and thread and sew the adornments on the ribbon. If you have more than one adornments, it's better if you sew them together and not in different stitches.

3. Tie a knot when you're done.
4. And you have you're own handmade bracelets for the party.


September 21, 2017

Current Obsession: The Chocker

I have enough left-overs from my projects to support my current obsession :).
Try looking in your boxes of buttons and fabrics. I am sure you can find something there that could easily be turned into a cute chocker. Here's something to inspire you!
Today, it's green velvet (yeah, such a surprise!) and beige suede.
Tip 1: elastic velvet is easier to use for chockers because you don't need to think about clasps.
Tip 2: buttons make fabulous pendants.

The Velvet Chocker
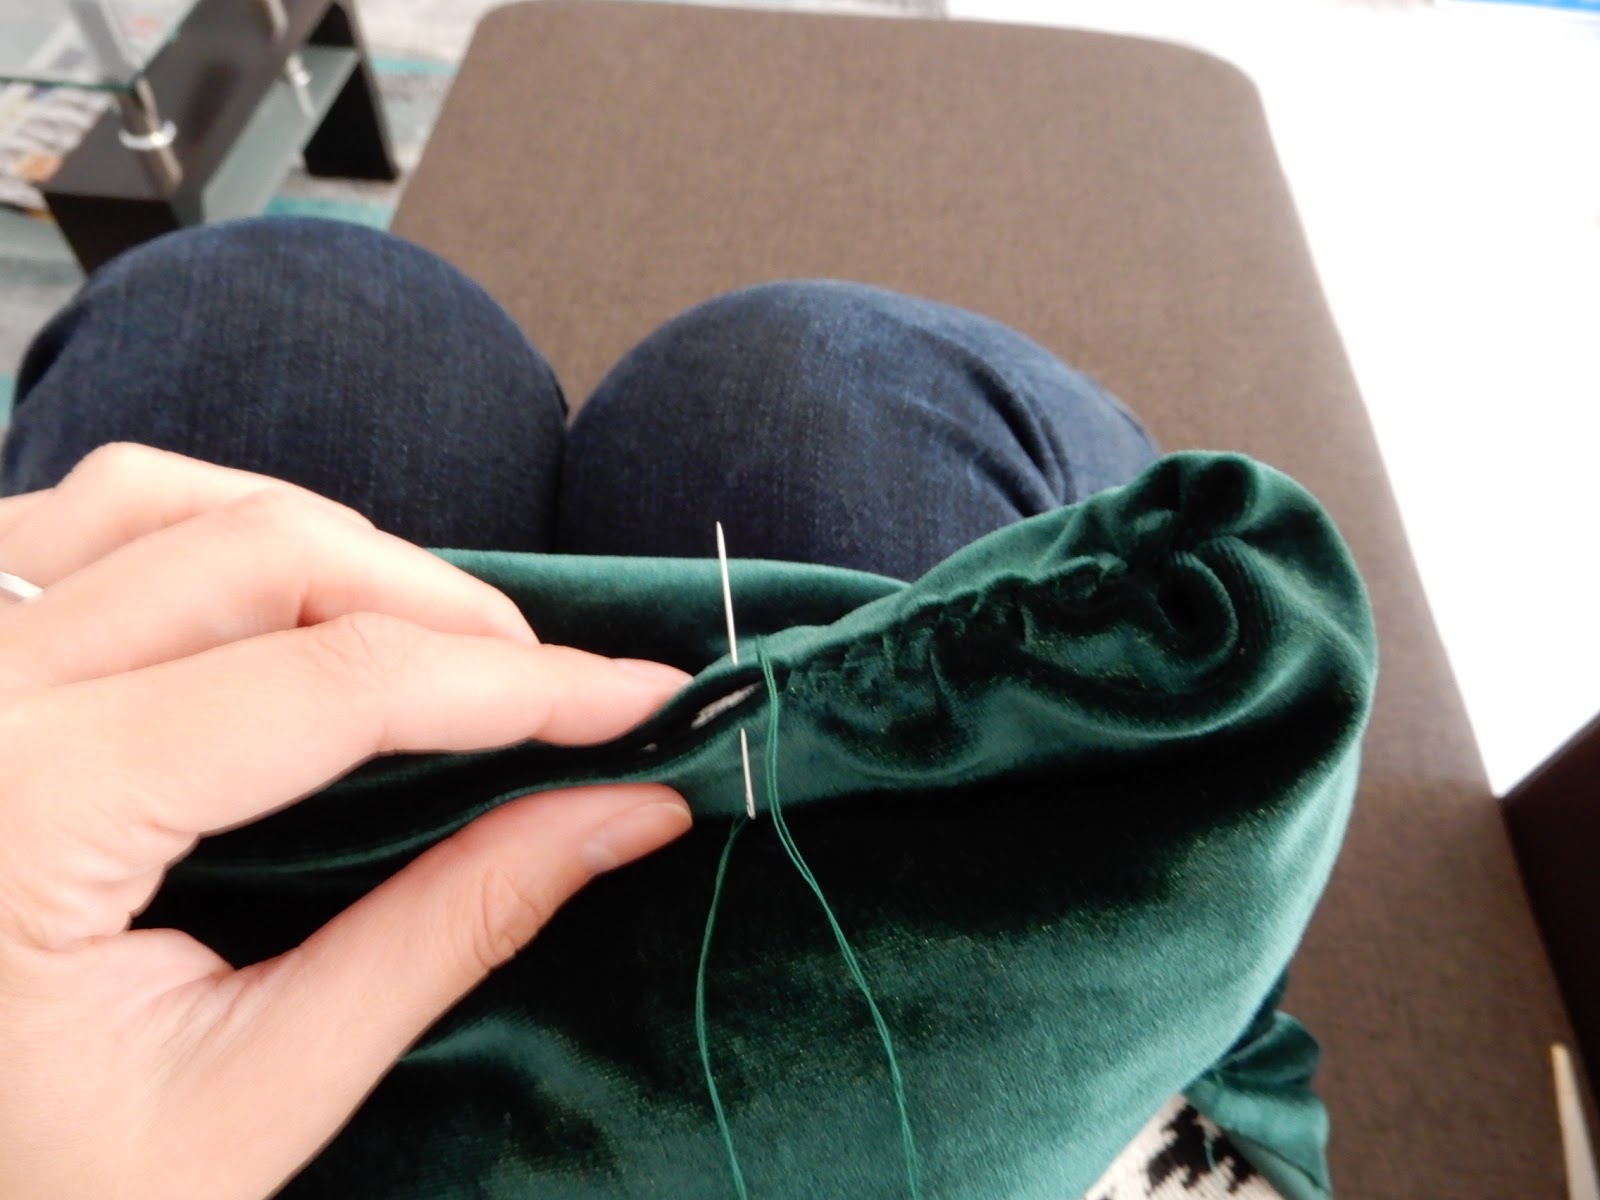
1. Make sure to have enough fabric.
2. Firstly, sew the vertical margins of the fabric. I used my sewing machine, but you could also sew it by hand.
3. Double the fabric orizontally. To be sure, use some pins. Then, sew accordingly.


4. Sew the chosen pendants right in the middle of the chocker.

5. Your velvet chocker is ready.

The Beige Suede Chocker
The fabric was not enough to encircle my neck, so I considered using the fabric as pendant. I just needed some ribbon.
1. I sewed the vertical margins of the fabric and cut two pieces of ribbon.
2. I sewed the two pieces on.
3. And here it is.

I surely hope you will find some inspiration in these chockers.


September 11, 2017

Facelifting to a Bag

Have you ever had a bag that was just perfect?! Well, I have.
And since the fabric started to deteriorate, my heart cringed at the thought of throwing it away. If you're experiencing the same issue, here's how to turn things around in favour of your bag.

 All you need is:
- some fabric (you can go ahead and cover all the bag like I did, or only cover some parts of it) and matching thread
- a pair of scissors
- (optional) a sewing machine
I had some fabric left from my last emerald project, so I decided to use it.
Since I had some already-cut fabric, I did the sewing in different stages. But if you have enough fabric to cover the entire part of the bag, don't shy away.

Advice: the inside must be dealt with at the beginning so that you are not left with raw sides.
Then, I went on with covering the top.

Since I wanted to give it a personal finish, I sewed by hand the back part.


And here it is, my emerald beautiful bag!