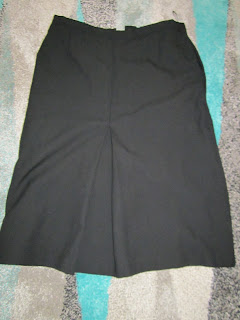
Ever since I saw Jennifer Aniston wearing a particular black skirt in one of Friends episode, I decided to tailor one for myself.
To make one, you'll need:
- a black gusset pencil skirt
- 20 cm of red fabric
- red and black thread
- [optional] a sewing machine.
I found an old and large skirt.
I made adjustments in order for it to better fit me, but if you can find one that already suits you, no need for extra work.
The red fabric I was telling you about.
Measure the gusset and cut the red fabric accordingly. After cutting it, you can sew it by using the sewing machine. For me, it was easier to sew it by hand.
Tadaaaam! And there you go, you've got your own Rachel's skirt.
Since Marc by Marc Jacobs showed accessories covered in bunnies, and talks began about whether the bunny is the new cat, I thought that it was about time that the squirrel got a little fame of its own, too. Therefore, this blog’s only intent is to bring justice to other cute furry animals besides cats and bunnies. Let’s fashion up, squirrels!
October 24, 2016
October 12, 2016
You too can make embroideries!
For some years now embroidery is in fashion, which explains the fact that the items of clothing with embroideries are more pricy. If you are in money shortage or just considering making your own embroidery, here are some tips from me.
1. Don't overthink it. Really, it’s easy! You do not need special skills to use the needle and thread.
2. Choose the item of clothing you want to embroider.
3. Decide which part of the item you want to embroider, and if you want your embroidery to have a certain shape. Tip: you can draw lines with a pencil and then sew over them.
4. I’m going to show you the easiest type of embroidery there is. Let’s take a simple T-shirt.
5. Find the thread you want to use. Tip: consider the color and thickness
of the thread.
6. If you drew lines with a pencil, sew over them.
8. Continue until you finish sewing (with or without the drawing on the item of clothing).
9. Mine is a little abstract, but just for you
to have an idea.
10. After you have finished, iron the embroidery. Thus, the thread and the material are leveled and the embroidery looks better.
Subscribe to:
Comments (Atom)


